Flamebender Ka’graz- Under the banner of the Iron Horde, Blackhand has enlisted Flamebender Ka’graz of the Burning Blade to imbue the Blackrock-forged armaments with the essence of flame. Along with her assistant Aknor Steelbringer, Ka’graz toils before an ever burning forge in support of the Iron Horde’s conquest of Draenor.

Flamebender Ka'graz has 4 phases
The structure of this fight depends on the bosses Energy
Each phase starts after 25 extra energy
New abilities in each phase will follow on for the next phases
At 100 Energy everything resets and starts over again
Beware of the other abilities boss does from start until the end of the fight, regardless of energy and phase.
Phase 1, 25 Energy – Molten Torrent is casted on random player. After 6s an 8y aoe meteor is released on that player. Needs to be shared with other players, otherwise dead.
Phase 2, 50 Energy – Cinder Wolves are summoned. It´s 2 wolves that are inter connected. They grow larger every 20s and has special abilities to beware of. Needs to be killed at the same time, asap.
Phase 3, 75 Energy – Blazing Radiance will be casted on random players. That player will pulsate fire (10y). Keep spread / move away from players.
Phase 4, 100 Energy – A Firestorm will be summoned and do raid damage. This firestorm buffs the Wolves to do the same dmg as well. So wolves needs to be dead before this phase and ppl should be stacked on boss for easier healing.
At Pull
- All ranged needs to be spread in a half circle (see figure) during the entire fight
- An add that is present at the start of the fight needs to be killed first.
- One tank on boss, one tank on the add.
- The player tanking the add needs to face him away from everyone, since he does a Devastating Slam.

0-25 Energy - Intro
This intro is all about killing the small add and get to know the abilities that are independent of boss’s energy.
The add (Aknor Steelbringer) will charge a random player and do knockback, just heal that player up
The boss casts Lava Slash which targets a player and shoots a line of fire on the ground between boss and that player. This line will be continued to another player if someone is close (7y) to the person getting the Lava Slash. Stay spread and you are fine.
The boss casts Enchanted Armament, which are swords that she throws at ppl. These swords does aoe fire damage. Move away from it vertically, not horizontally because then you danger the raid by being too close to other ppl.
![]()
- One tanks the boss Kagraz
- One tanks the add, Aknor. Face him away from everyone, since he does a Devastating Slam.
![]()
- Stay spread, always beware of how close other players are.
- When moving away from fire swords (Enchanted Armament) move vertically, not horizontally
![]()
- Nuke the add first before boss
- Stay spread, always beware of how close other players are.
- When moving away from fire swords (Enchanted Armament) move vertically, not horizontally
Phase 1 – 25 Energy (The Molten Torrent)
Expcept for Lava Slash and Enchanted Armament that will be cast the entire fight, the boss Ka´Graz will now cast Molten Torrent.
Molten Torrent is a meteor that will launch on a target. It does a lot of damage, so only survival is to let other players soak the damage with you (or use mitigation spells).
The best tact is moving to the melee group when you get it. You have 6 seconds to move there which is plenty of time.
![]()
- Same tank still tanks the add, if it´s not dead.
- Other tank still tanks the boss.
![]()
- Stay spread, always beware of how close other players are.
- When moving away from fire swords (Enchanted Armament) move vertically, not horizontally
- The Molten Torrent does high damage, so get ready to heal melee when the person that has it moves in and lets them help with soaking it.
- If you are targeted by Molten Core, move to melee group, for soaking.
![]()
- Stay spread, always beware of how close other players are.
- When moving away from fire swords (Enchanted Armament) move vertically, not horizontally
- If you are targeted by Molten Core, move to melee group, for soaking.
- If you are melee (no matter if u are target or not) then make sure you are close enough to other melee (8y) to soak the Molten Core.

Phase 2- 50 Energy (The Wolves)
At 50 energy, two fire wolves will spawn with a fire line connecting them together. They grow larger every 20s leading to higher dmg. These wolves needs to be killed with a time range of 8s after one is down to 0 HP, if not, they both get to 100 HP again. Not only, These 2 wolves have special abilities:
- Fixate
Picks a player and chases them - Overheated
One of the two wolfs will always be overheated (increases in size as well) and does extra dmg. Needs to be tanked - Charring Breath
Cone of fire dmg. Gives a debuff that increase dmg taken from this breath by 200%. Tank switch at each breath. - Fiery Link
Is the fire line that connects the wolves together. If a player touches this fire link he/she gets fire dmg dot (dispel) called Singe. - Rekindle
If one wolf is at 0HP and the other alive, you have 8s to take down the other wolf. Otherwise both comes up to 100% health. And since they need to be killed before phase 4, this will significantly increase a wipe.
Strategy on Phase 2, handling the Wolves
The large Wolf (overheated) will be tanked next to the boss but between boss and ranged (se figure). But faced to the side, away from melee and ranged.
When a wolf fixates, kite that wolf front and back in the area between ranged and boss (see figure). This way, ranged and melee will not get dotted by the fire line.
There is always 2 Fixate before that small wolf gets enraged, turning big. When enranged, tanks picks that wolf up and tanks it the same way like last one. The other wolf gets small again and starts fixating ppl instead.
The tank switch on wolves:
At spawn, offtank picks up the enraged Wolf.
When wolves swap enrage, offtank picks up boss and main tank picks up the new enraged wolf.
Problem: When Wolves spawn, you don’t know which one will be the enraged one. So stand in between, were boss is from start. And taunt fast the one that gets enraged.
![]()
- Same tank still on boss
- When Wolfes spawn, offtank picks up the enraged one fast.
Tank swap when wolves swap enrage. Offtank picks up boss and main tank picks up the new enraged wolf.
- Tank enraged close to boss but faced AWAY from every player.
![]()
- Beware if someone fails at fixate to heal that person.
- Beware if the fire line linking the two wolves passes a player, then dispel.
- Stay spread, always beware of how close other players are.
- When moving away from fire swords (Enchanted Armament) move vertically, not horizontally
- The Molten Torrent does high damage, so get ready to heal melee when the person that has it moves in and lets them help with soaking it.
- If you are targeted by Molten Core, move to melee group, for soaking.
![]()
- If fixated, kite the wolf between ranged and melee. So the fire line linking the two wolves doesn’t pass players.
- Stay spread, always beware of how close other players are.
- When moving away from fire swords (Enchanted Armament) move vertically, not horizontally
- The Molten Torrent does high damage, so get ready to heal melee when the person that has it moves in and lets them help with soaking it.
- If you are targeted by Molten Core, move to melee group, for soaking.

Phase 3- 75 Energy (Blazing Radiance)
In this phase when the boss hits 75 energy, he will cast Blazing Radiance on random players. It is a pulsating aoe dmg. Just move away from ppl if you are affected.
Phase 4- 100 Energy (Firestorm)
Flamebender Ka´Graz will cast her best spell at 100 energy, the Firestorm. This ability does fire damage every 0.5 second for 12s.
Everyone
Stack on boss for better heals.
 Gruul
Gruul Oregorger
 The Blast Furnace
 Hans'gar and Franzok
 Flamebender Ka'graz
 Kromog
 Beastlord Darmac
 Operator Thogar
 The Iron Maidens
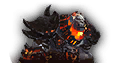 Blackhand


