Background
On the northern coast of Gorgrond, the Iron Docks represent the heart of the Iron Horde's naval might. Huge warships and artillery, forged and assembled within the Blackrock Foundry, are readied for war within this massive port. The greatest beasts of Draenor are broken and trained alongside elite infantry units, comprising the ground troops that will surge ashore to break the will of any who would dare oppose the Iron Horde.
Bosses
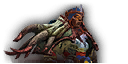
 Fleshrender Nok'gar
This fierce Warsong warleader has risen rapidly through the ranks of the Iron Horde, and now commands a battalion of orcish soldiers. From atop his wolf Dreadfang, he surveys their drilling and preparation as they ready themselves to lead a naval assault on Shattrath.
Key abilities
Fleshrender Nok'gar rides into battle on his trusted wolf Dreadfang, and commands a mighty Grom'kar archer battalion. After enough time has elapsed, or when Dreadfang falls, Nok'gar will dismount to attack directly and bring new attacks to bear.
![]()
- Nok'gar cannot be directly targeted or attacked while mounted.
- Move quickly to get out of the line of fire of Burning Arrows or Barbed Arrow Barrage.
- Immediately stop attacking Nok'gar while he is under the effects of Reckless Provocation to avoid being feared.
![]()
Move quickly to get out of the line of fire of Burning Arrows or Barbed Arrow Barrage.
![]()
- Nok'gar cannot be directly targeted or attacked while mounted.
- Move quickly to get out of the line of fire of Burning Arrows or Barbed Arrow Barrage.
- Move Nok'gar and Dreadfang quickly away from the arrow barrages that Nok'gar calls down.
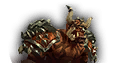
 Grimrail Enforcers
The Grimrail Enforcers are elite mercenaries in the employ of the Blackfuse Company, hired to protect the trains that run through Gorgrond. The trio consists of a Burning Blade swordsman, a goblin engineer, and a shaman who is versed in dark blood magic. The sole threads that bind them are greed and zeal for killing.
Key abilities
The trio of Enforcers attack together, with Makogg wielding his blade, as Neesa deploys traps and bombs, and Ahri'ok uses blood incantations to protect her allies and afflict her foes
What to think about depending on your role
![]()
- Avoid damaging an Enforcer that is protected by [Sanguine Sphere] until the effect fades.
- Avoid [Ogre Traps], which immobilize victims and make them vulnerable to [Big Boom].
- Spread out when Neesa prepares to fire her [Hyper-Jumper Cables 9000-XL].
![]()
- Avoid [Ogre Traps], which immobilize victims and make them vulnerable to [Big Boom].
- Spread out when Neesa prepares to fire her [Hyper-Jumper Cables 9000-XL].
![]()
- Avoid damaging an Enforcer that is protected by [Sanguine Sphere] until the effect fades.
- Avoid [Ogre Traps], which immobilize victims and make them vulnerable to [Big Boom].
- Spread out when Neesa prepares to fire her [Hyper-Jumper Cables 9000-XL].
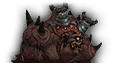
 Oshir
Oshir
Key abilities
After breaking free from his bonds, Oshir rampages around the loading area, pouncing on enemies to ravage them with his claws and teeth.
What to think about depending on your role
![]()
- Focus your damage to quickly break Oshir out of [Feeding Frenzy].
- Be alert when Oshir casts [Breakout] and defeat the released beasts.
![]()
- Focus your healing on the victim of Oshir's [Feeding Frenzy].
![]()
- Focus your damage to quickly break Oshir out of [Feeding Frenzy].
- Be alert when Oshir flips backwards to avoid his [Primal Assault].
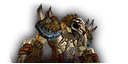
 Skulloc
The mighty gronn Skulloc represents one of the great successes of the Iron Horde's subjugation of the giants of Gorgrond. Towering over the Grom'kar forces, and fitted with a pair of cannons that would feel at home on any ironclad warship, Skulloc stands ready to unleash destruction at the behest of his new masters.
Key abilities
Skulloc attacks with fierce melee strikes, alongside the warrior Koramar and First Mate Zoggosh in a mechanized turret. Periodically, Skulloc slams the deck, knocking players to the rear of the ship as he begins to unleash a withering Cannon Barrage.
What to think about depending on your role
![]()
- Quickly hide behind cover when Skulloc begins [Cannon Barrage], working your way towards him during lulls between volleys.
- Do not linger near the rear of the ship during [Cannon Barrage], or [Backdraft] will incinerate you.
![]()
- Quickly hide behind cover when Skulloc begins [Cannon Barrage], working your way towards him during lulls between volleys.
- Do not linger near the rear of the ship during [Cannon Barrage], or [Backdraft] will incinerate you.
![]()
- Quickly hide behind cover when Skulloc begins [Cannon Barrage], working your way towards him during lulls between volleys.
- Do not linger near the rear of the ship during [Cannon Barrage], or [Backdraft] will incinerate you.


